As the most modern installment in the Monster Hunter franchise, Monster Hunter Wilds could be seen as the most accessible and welcoming to new players. If Wilds is your first foray into the incredible world of Monster Hunter, then you can rest assured that its going to welcome you with open arms! However, Monster Hunter Wilds is still quite a mechanics heavy game that won’t always be completely intuitive to its newer hunters. This guide aims to assist new hunters by covering the basics of Monster Hunter combat!
How To Use Your Item Bar
Your item bar can be found at the bottom right of your screen for the vast majority of your time in Wilds, and learning to navigate it is essential for your monster hunting experience. To navigate your item bar on controller, you will need to hold down left bumper and use X and B/square and circle to scroll through your equipped items. What you have in your item bar is up to you, and can be managed from the item menu in your tent, but there are some defaults on your item bar that you’ll want to know how to use from the get go.

Primarily, that is your whetstone, potions, and rations. Whetstones are used to sharpen your weapon if you’re using anything other than the three ranged weapons (bow, light bowgun, and heavy bowgun). Potions, unsurprisingly, are used to heal you. Rations help to keep your stamina up. All three are important to use judiciously in the middle of combat. To do so from your item bar, you will need to navigate to their icon and then press X/square to use the item. This is how you will use most of your items but, for these essential items, there is an even quicker way.
How To Use Your Radial Menu
Radial menus are the quickest and easiest ways to use your most important items in the middle of combat. Don’t worry if you can’t get the hang of them straight away! I went through the whole main story using only the item bar. However, for some of the harder, post-story monsters, using the radial menu can really help to speed up necessary healing and recovery. The sooner you can get to grips with it, the better off you’ll be. As with the item bar, you’ll need to hold left bumper to bring up the radial menu. From there, you can use the D-Pad to select the shortcut you want to use, although the most important one is usually selected automatically. That is the ‘Action’ radial menu.
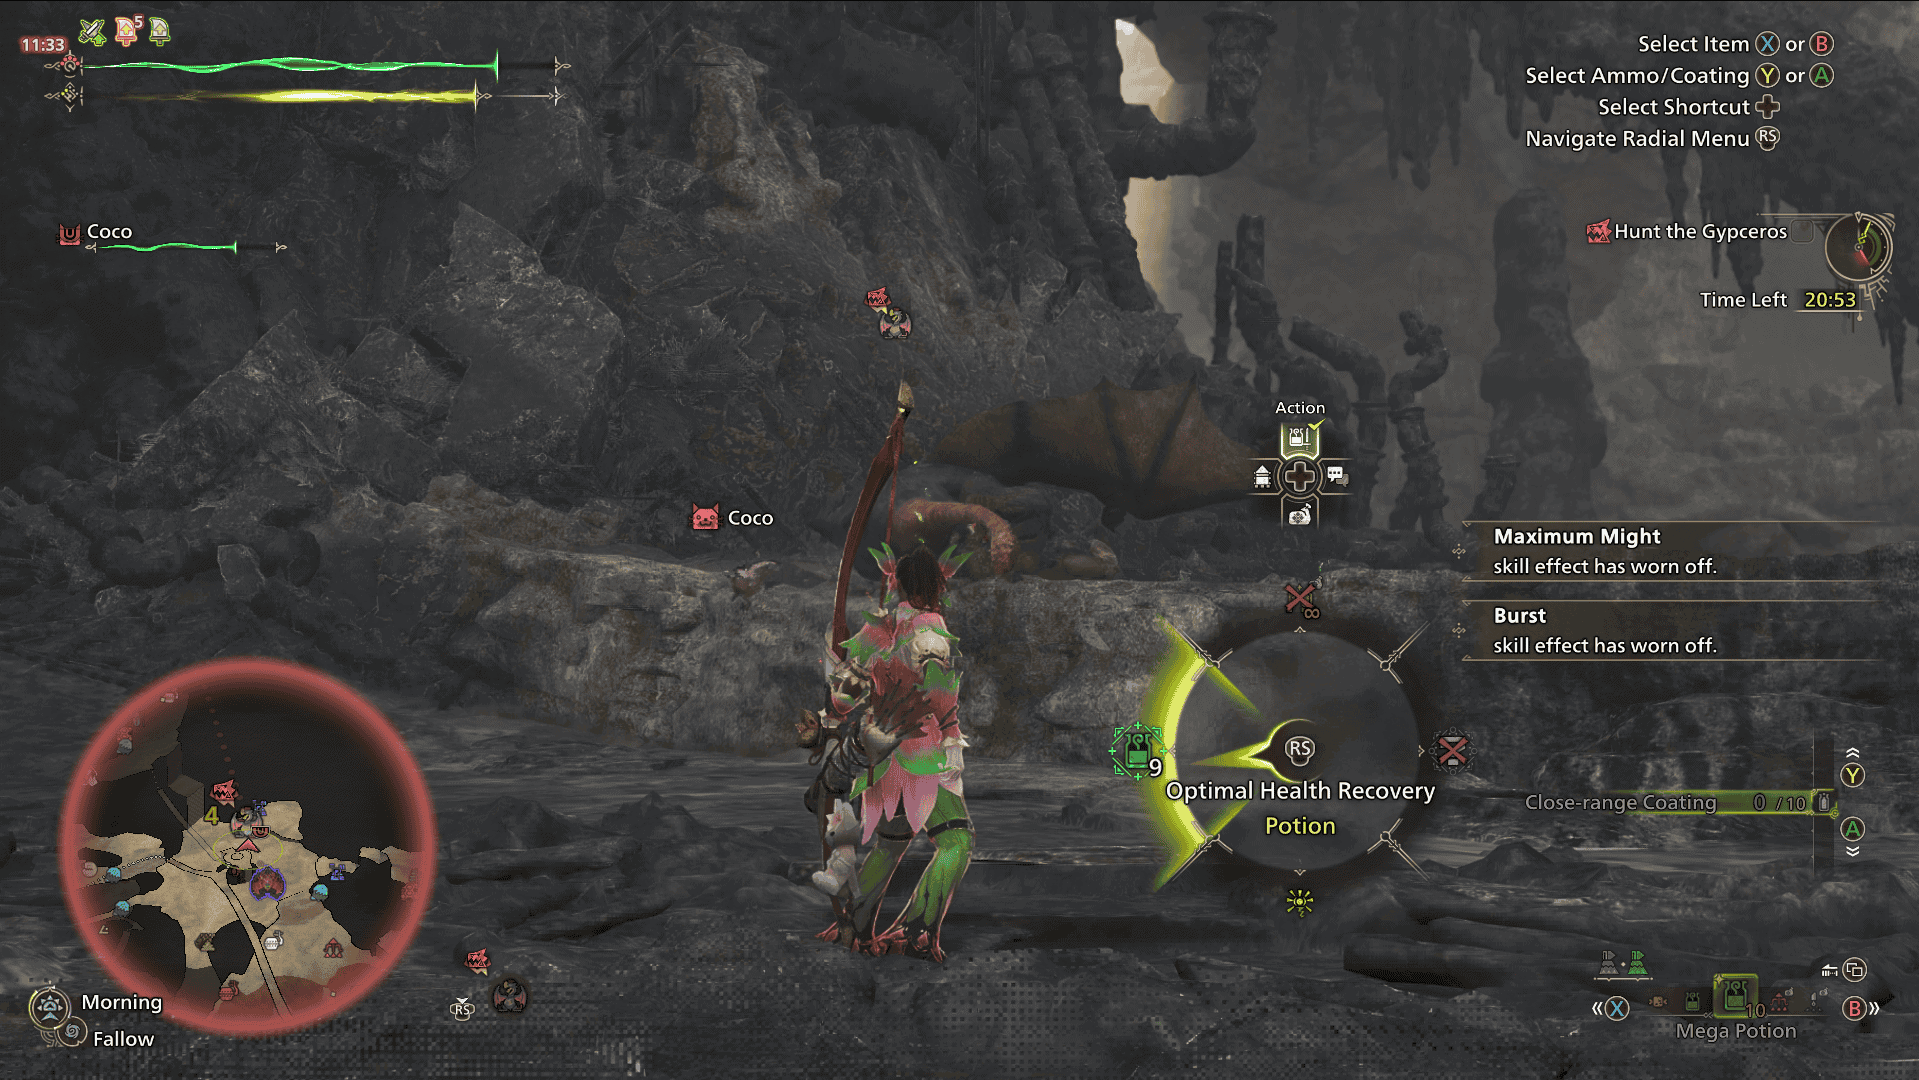
From there, use the right stick to select one of four options: Optimal Health Recovery, Whetstone, Optimal Status Recovery, and Send SOS Flare. The first three are your most important ones. Optimal Health Recovery will instantly use whichever of your potions would provide the most optimal healing for your hunter in any given moment. The Whetstone shortcut will instantly begin sharpening your weapon. The Optimal Status Recovery will use whichever item will negate your current status ailment. An important note is that the radial menu is just a quick way to use the items already in your item bar – if you have no potions or don’t have the item needed to combat a certain ailment, then the radial menu won’t be able to help you!
How To Use The Focus Mode
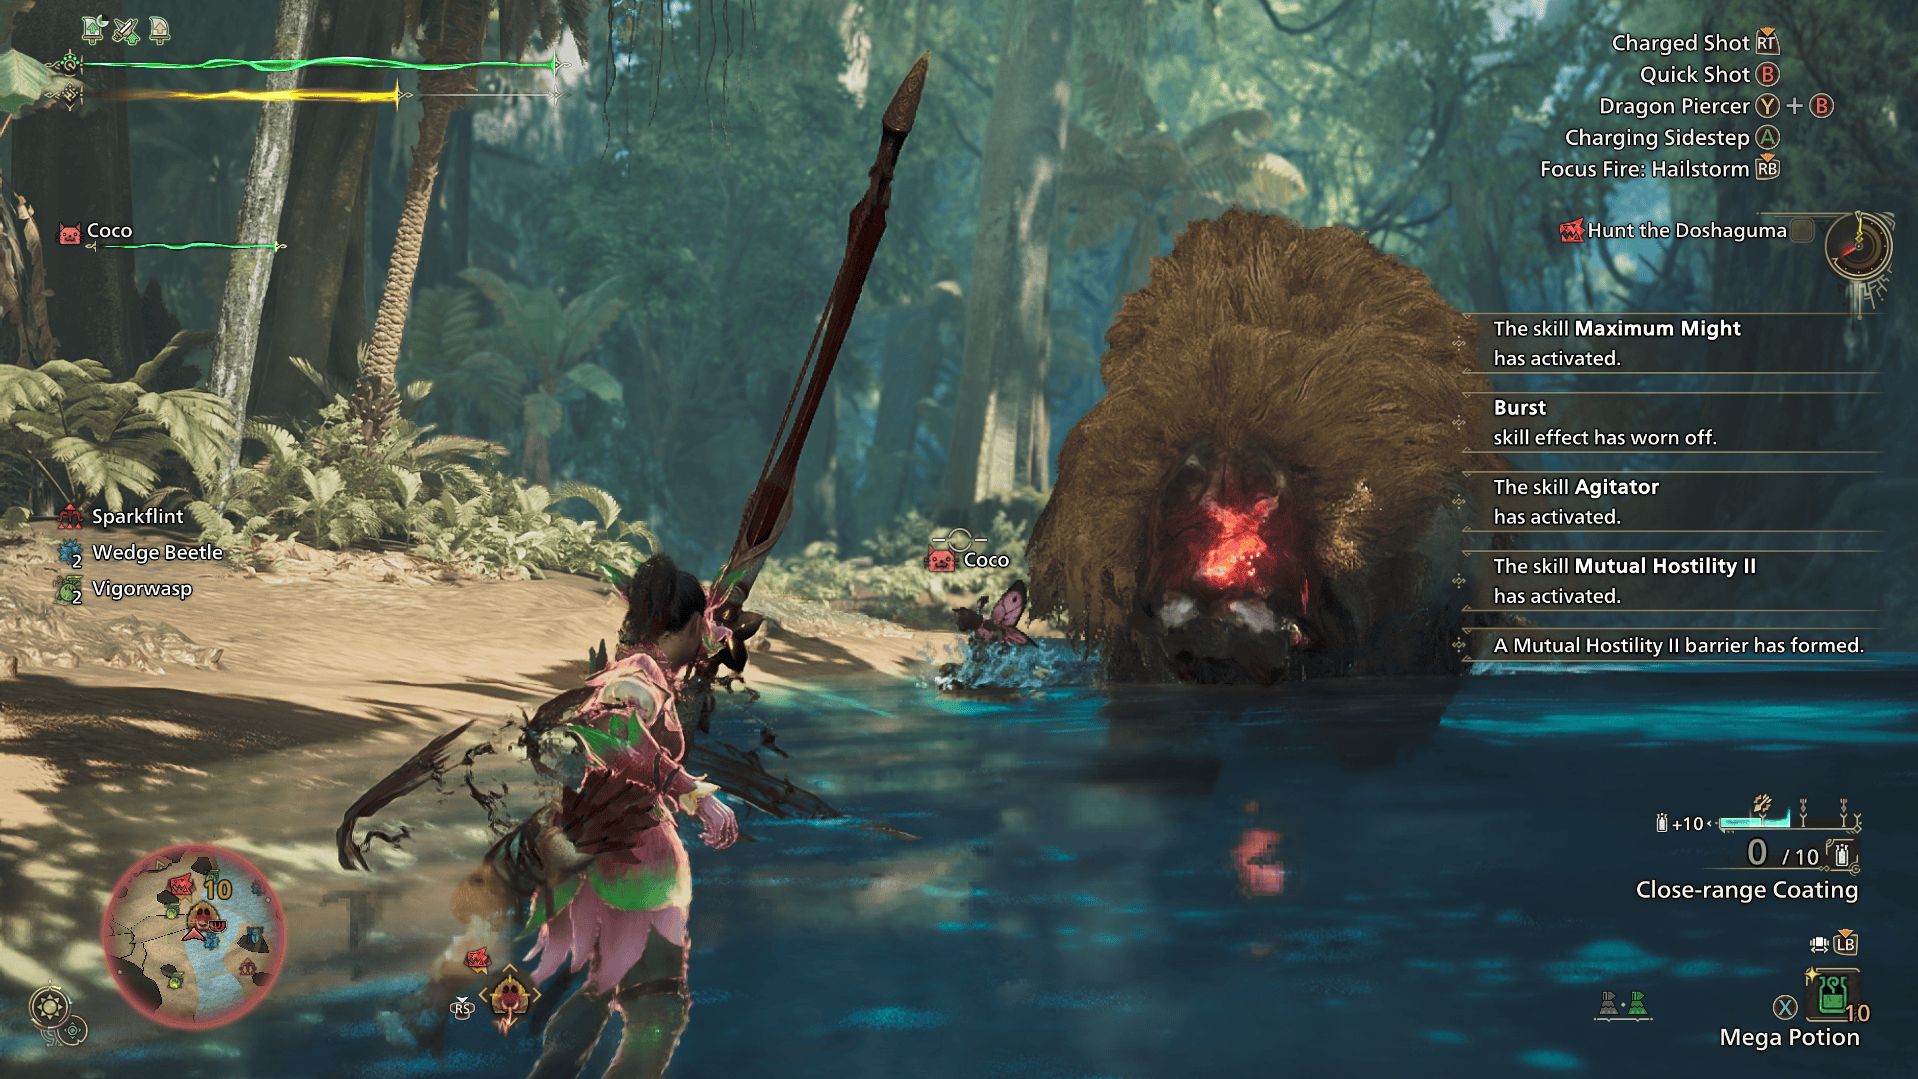
The focus mode combat mechanic is unique to Monster Hunter Wilds, so your Monster Hunter veteran friends will be just as unfamiliar with this mechanic. To enter focus mode, you simply need to draw your weapon and hold down left trigger. The primary benefit to focus mode, is that it allows for more precise aiming of your weapons. This means that weapons such as greatsword, which could often struggle to land their hits in previous entries, are now more reliable at hitting their targets.
Focus mode will also open up some unique abilities, such as the Arc Shot on the bow. Finally, focus mode allows you to see wounds on the monster, another important and new mechanic to Monster Hunter Wilds combat. Long story short, focus mode is very important to get to grips with and I spend more time in focus mode than out of it!
What Are Wounds In Monster Hunter Wilds
Wounding is another new mechanic in Monster Hunter Wilds combat. By doing enough repeated damage to a monster in one spot, a wound will eventually open up. You will be able to see them in focus mode as glowing red marks, or blue in the instance of stronger tempered wounds. By attacking these wounds directly, you can deal large amounts of damage to the monster, as well as triggering some unique abilities based on your weapon. It also has a high likelihood to stagger the monster. Popping wounds can be one of the most satisfying parts of a monster hunt! But there is some etiquette to wound popping and times when you should hold off on it if you can, such as in our next topic…
How To Mount A Monster In Monster Hunter Wilds
Mounting the monster is an iconic Monster Hunter mechanic, where one player jumps on the back of the monster for a short period of time. It’s such a fun mechanic, but one that comes with things for unfamiliar players to bear in mind. To mount a monster, you typically need to launch yourself onto it from above. This can be achieved in any number of ways, such as by using your environment, jumping off your Seikret, or employing certain weapon manoeuvres that launch your hunter into the air. Once on the monster, your goal should be to stab it repeatedly to create wounds! The monster won’t take kindly to this and will try to throw you off, so you should use your left stick to move to a different section of the monster or hold right trigger to brace yourself once your screen starts to darken around the edge. Notably, if you stand on the monster’s head until it starts to rush towards a wall, it is likely to knock itself out for some extra damage and stun time. Once you’ve opened up as many wounds as you can, use right bumper to perform a take-down finisher on one of the wounds.
If you’re on the ground while someone else has performed a mount, there are also a few pointers to remember. Firstly, hunters on the ground will do less damage to the monster while someone else is mounting it. That makes this the perfect time to heal, use a consumable, place traps, or any other mechanic that is worth doing but takes some time away from the DPS. The other tip is that wound etiquette I mentioned. Your mounted friend is likely to be trying to place as many wounds on the monster as they can but, if you pop the wounds while they’re still mounting the monster, it’s highly likely to stun the monster out of the mount before your friend can finish creating more wounds. Typically, it’s best to hold off until your mounted friend performs their finisher!

How To Control Your Seikret
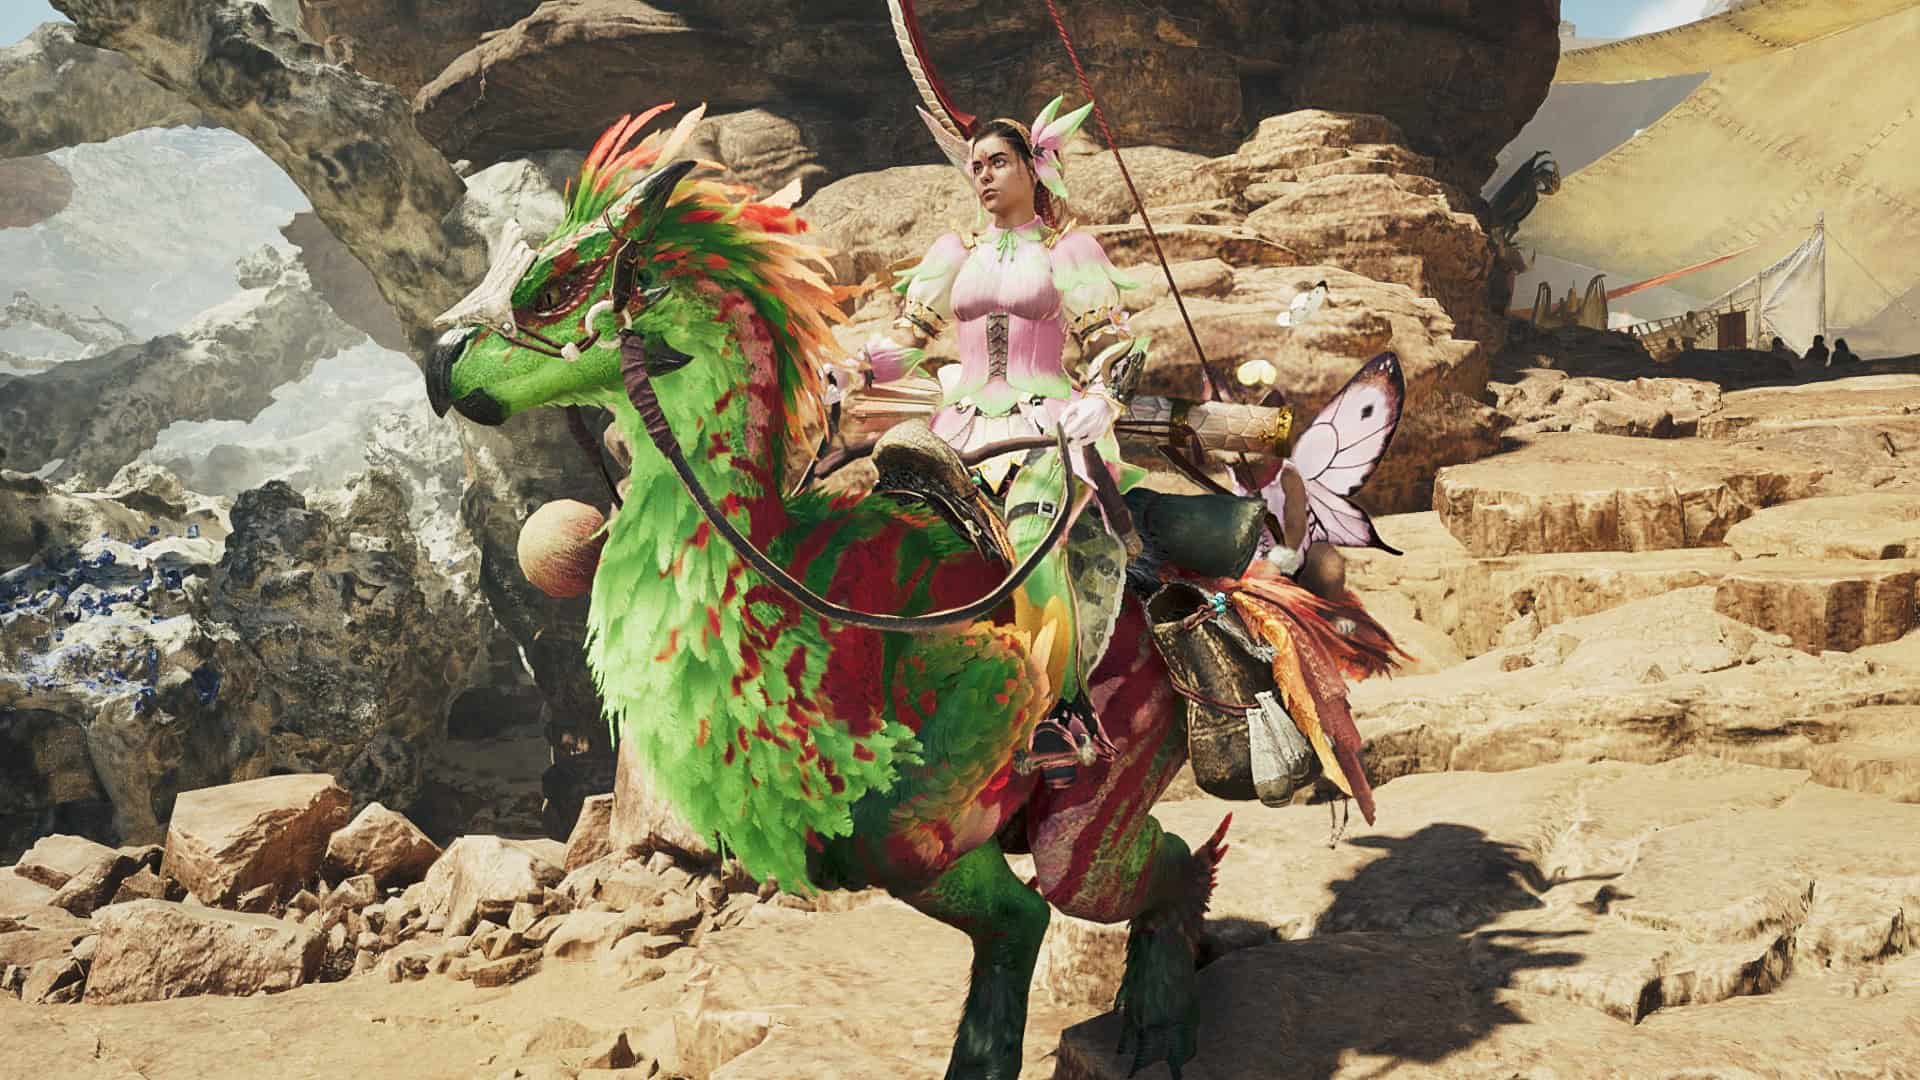
Seikrets are wonderful new mounts introduced in Monster Hunter Wilds. You’ll get to ride one from your very first quest, but will unlock your own Seikret during the Village of Whispering Winds mission after defeating the Quematrice. Seikrets are nifty mounts with some very handy mechanics, but a few of them can be a bit obscure for new players. Your navigational controls are possibly the easiest to pick up. Up on the D-Pad will call your Seikret to you and allow you to mount it. Nice and simple but, as a tip for new players, this can be a really handy tool to pick your hunter up and whisk them out of danger when the need arises, typically when your hunter has been knocked down. Right bumper will speed up your Seikret, while right trigger will slow them down.
Seikrets also act as your path-finding in Wilds. If you have a way-point selected, including a targeted monster, and press up on the D-Pad while mounted, your Seikret will path-find to the targeted location. Now for the more obscure but very helpful mechanics! Believe it or not, your Seikret is actually the only way to switch weapons between your primary weapon and your secondary weapon (you will unlock the ability to equip one along with your Seikret). Pressing right on the D-Pad, either while mounted or to call your Seikret to you, will cause you to switch from your primary to secondary weapon and vice versa. Finally, during a hunt you will sometimes hear your handler call out that they’ve added supplies to your Seikret’s pouch. That’s great! But they don’t give you a heads up on how to access that pouch! It’s simply left on the D-Pad, and will contain extra items tailored to your particular hunt.
How And When To Use Traps In Monster Hunter Wilds
As with other Monster Hunter titles, hunters are encouraged to use traps to their advantage during their hunts. However, knowing how to and finding the right times to can be tricky for players new to the franchise. Your equippable traps, which you can sort into your item bar as discussed prior, include pitfall traps and shock traps, as well as barrel bombs, to some degree. Each of these can be placed the same way you would use any item from your item bar. Once placed, a monster that walks into a trap will be immobilized for a short amount of time, creating great openings for your hunters. Some monsters may be resistant to certain types of traps, and all monsters will develop more resistance to traps with repeated use in the same fight. Barrel bombs are slightly different, instead being used to deal large damage to the monster.
Now that you know how to place traps, it’s important to pick your moments carefully. Placing traps can take a little time, leaving you vulnerable and not dishing out damage. You’ll find your knack for placing traps with time, but I’ve found that good opportunities include before fights (especially if you know which direction the monster will flee), when the monster is being mounted (just don’t place them too close to the mounted monster or you risk ending the mount early), and while the monster is sleeping towards the end of its hunt (this is a particularly good time for barrel bombs). If you can time it and position it just right, you can also save fellow hunters that have been grabbed by placing a trap under the monster while it’s locked in its animation. However, there is an easier way to negate these big attacks and take advantage of terrain traps…

How To Use Your Slinger In Monster Hunter Wilds
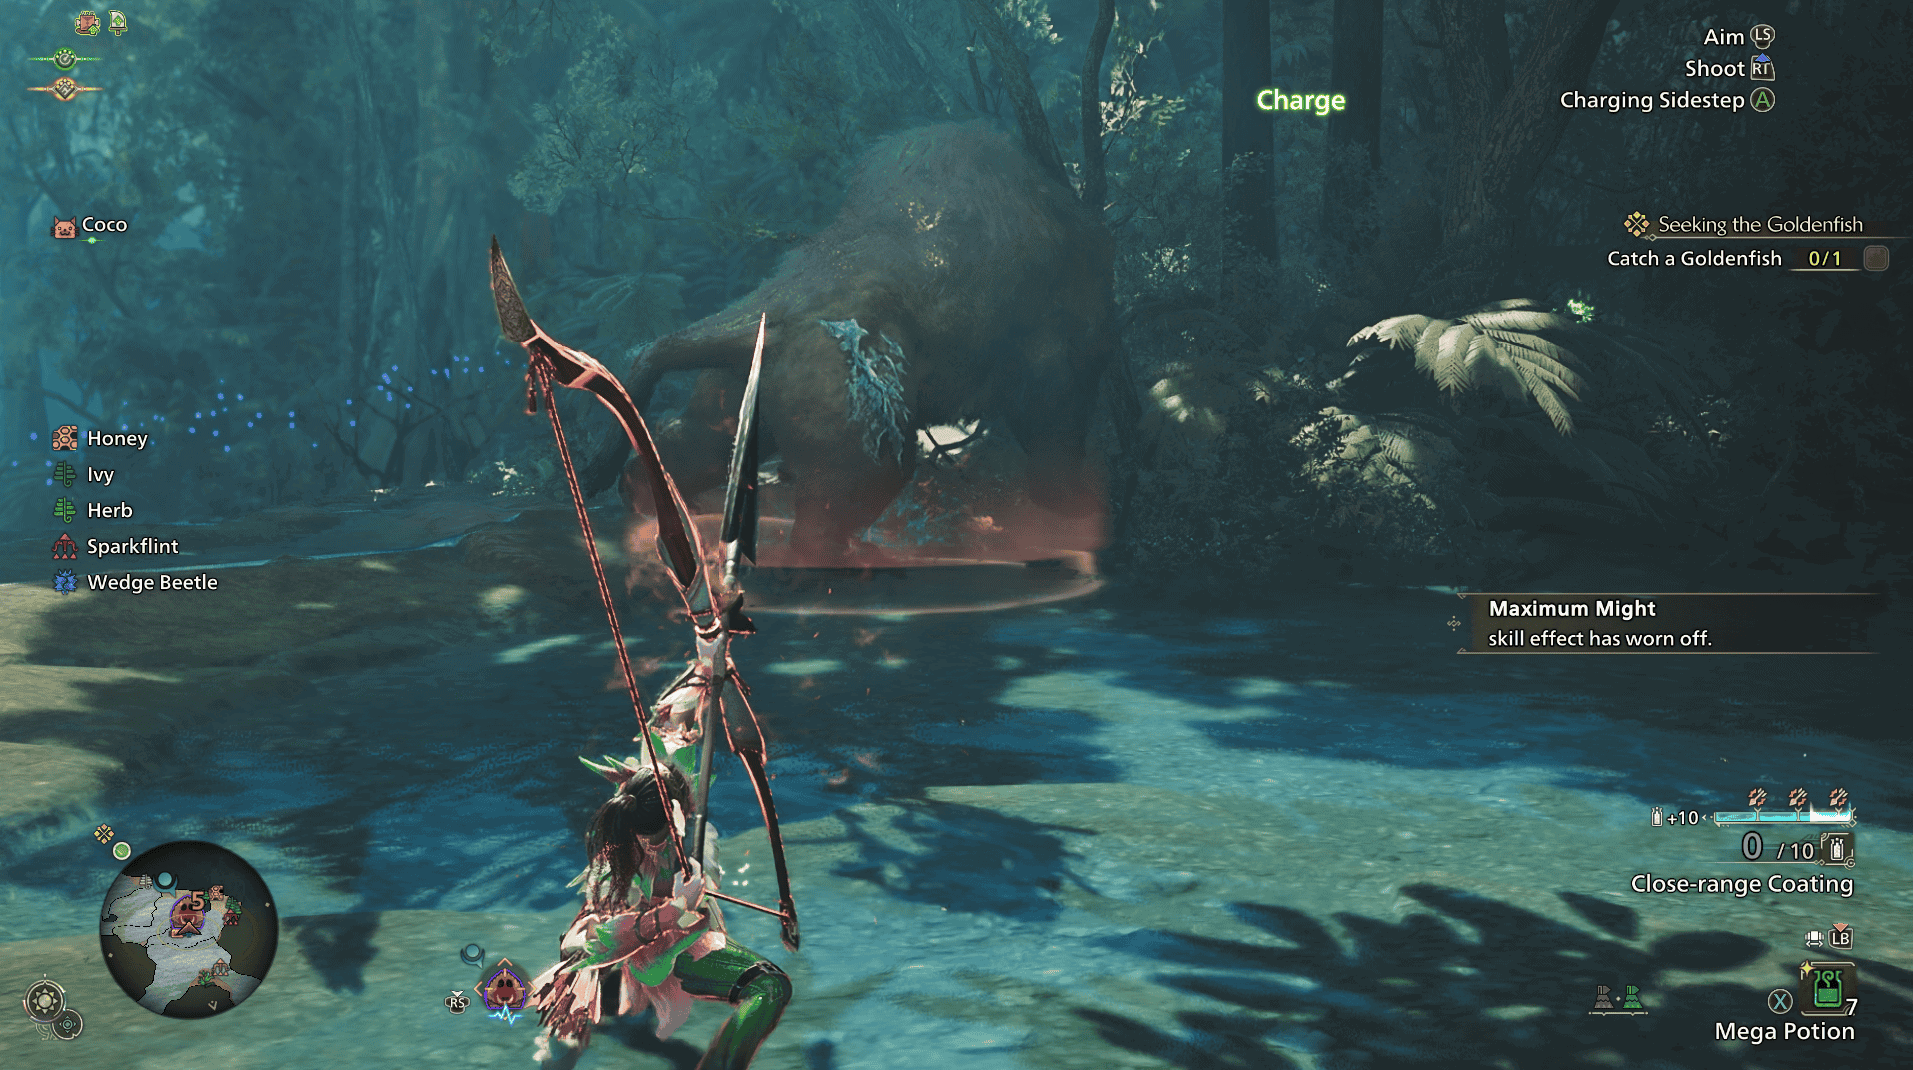
The slinger is a valuable tool that takes some getting used to, but can be a lifesaver when handled effectively. While equipped with a type of slinger ammo, you can hold down left trigger and press right trigger to fire your slinger ammo. But that’s not going to help you if you want to fire your slinger ammo mid-fight, which you often will. While your weapon is drawn, you instead fire your slinger by entering focus mode (holding down left trigger) and pressing the left stick.
There are far too many variations of slinger ammo to bog new players down with (but if it has ‘pod’ in the name then you can rest assured it’s probably slinger ammo). The ones you’ll want to be aware of and learning to use as a new player are dung pods and flash pods. Flash pods are common slinger ammo that can be used to help other hunters escape a grab attack, or even to free yourself if you’re the one who gets grabbed. Dung pods can be fired at a monster to cause it to flee a fight, useful if you’re being ganged up on by random monsters that you’re not trying to start any fights with! Slingers can also be used to trigger terrain traps, as well as to gather items from a distance, which brings us onto the next topic…

How And What To Gather In Monster Hunter Wilds
In Monster Hunter games, you take on the role of a hunter, but also a gatherer! Gathering items found in the wilderness will be essential to your survival and success as a hunter. But, with so many different things to gather (and to bog down your item storage), it’s helpful to know what’s worth grabbing. Firstly, to gather your materials, you can either approach the item and press B/circle or use left trigger to aim your slinger at it and B/circle to gather it from a distance. The gatherables you’ll want to keep an eye out for are herbs, honey, hot peppers, and chillshrooms. These will be your best gathering friends as a new player. Herbs are used to craft potions, with honey being used to turn them into mega potions. Hot peppers and chillshrooms will help you navigate later areas, as they are used to craft hot drinks and cool drinks respectively. Cool drinks are needed to avoid taking constant damage in extremely hot areas, while hot drinks prevent drastic stamina loss in extremely cold climates.
You can also use your slinger to grab some helpful endemic life as and when you spot them. Primarily, you’ll want to be on the lookout for Vigormantle Bugs, Chillmantle Bugs, Heatmantle Bugs, and Wiggly Litchi. Vigormantle Bugs are a quick way to restore health, while Wiggly Litchi give a stamina boost and slow down stamina loss. Chillmantle Bugs and Heatmantle Bugs act as endemic stand-ins for cool drinks and hot drinks, if you find yourself stuck in a harsh environment without your potions!

The Importance Of Carving In Monster Hunter Wilds
Once you’ve killed a monster, including any smaller monsters, a carcass will be left behind. Carve it! Get in the habit of always carving your monsters! To do so, you’ll have to put your weapon away and get locked into a fairly lengthy animation, so make sure it’s somewhat safe for you to carve. They make time for you at the end of a hunt for this very purpose. Some monsters will have tails that can be severed mid-hunt. In this instance, carving the tail once the monster has fled the area but before you give chase is generally a good idea.
Once your weapon is away and you’re stood by a carcass, press B/circle to carve the monster. You’re likely to be able to carve multiple times, and holding down B/circle until you’ve carved as much as you can will speed up this process. This is how you get materials for your weapons and armor, including from smaller monsters, so carve, carve, and carve again! Notably, some weapon/armor materials can also be obtained from mining outcrops and bone piles, so those are worth grabbing too! You can harvest them the same way you would carve a monster.

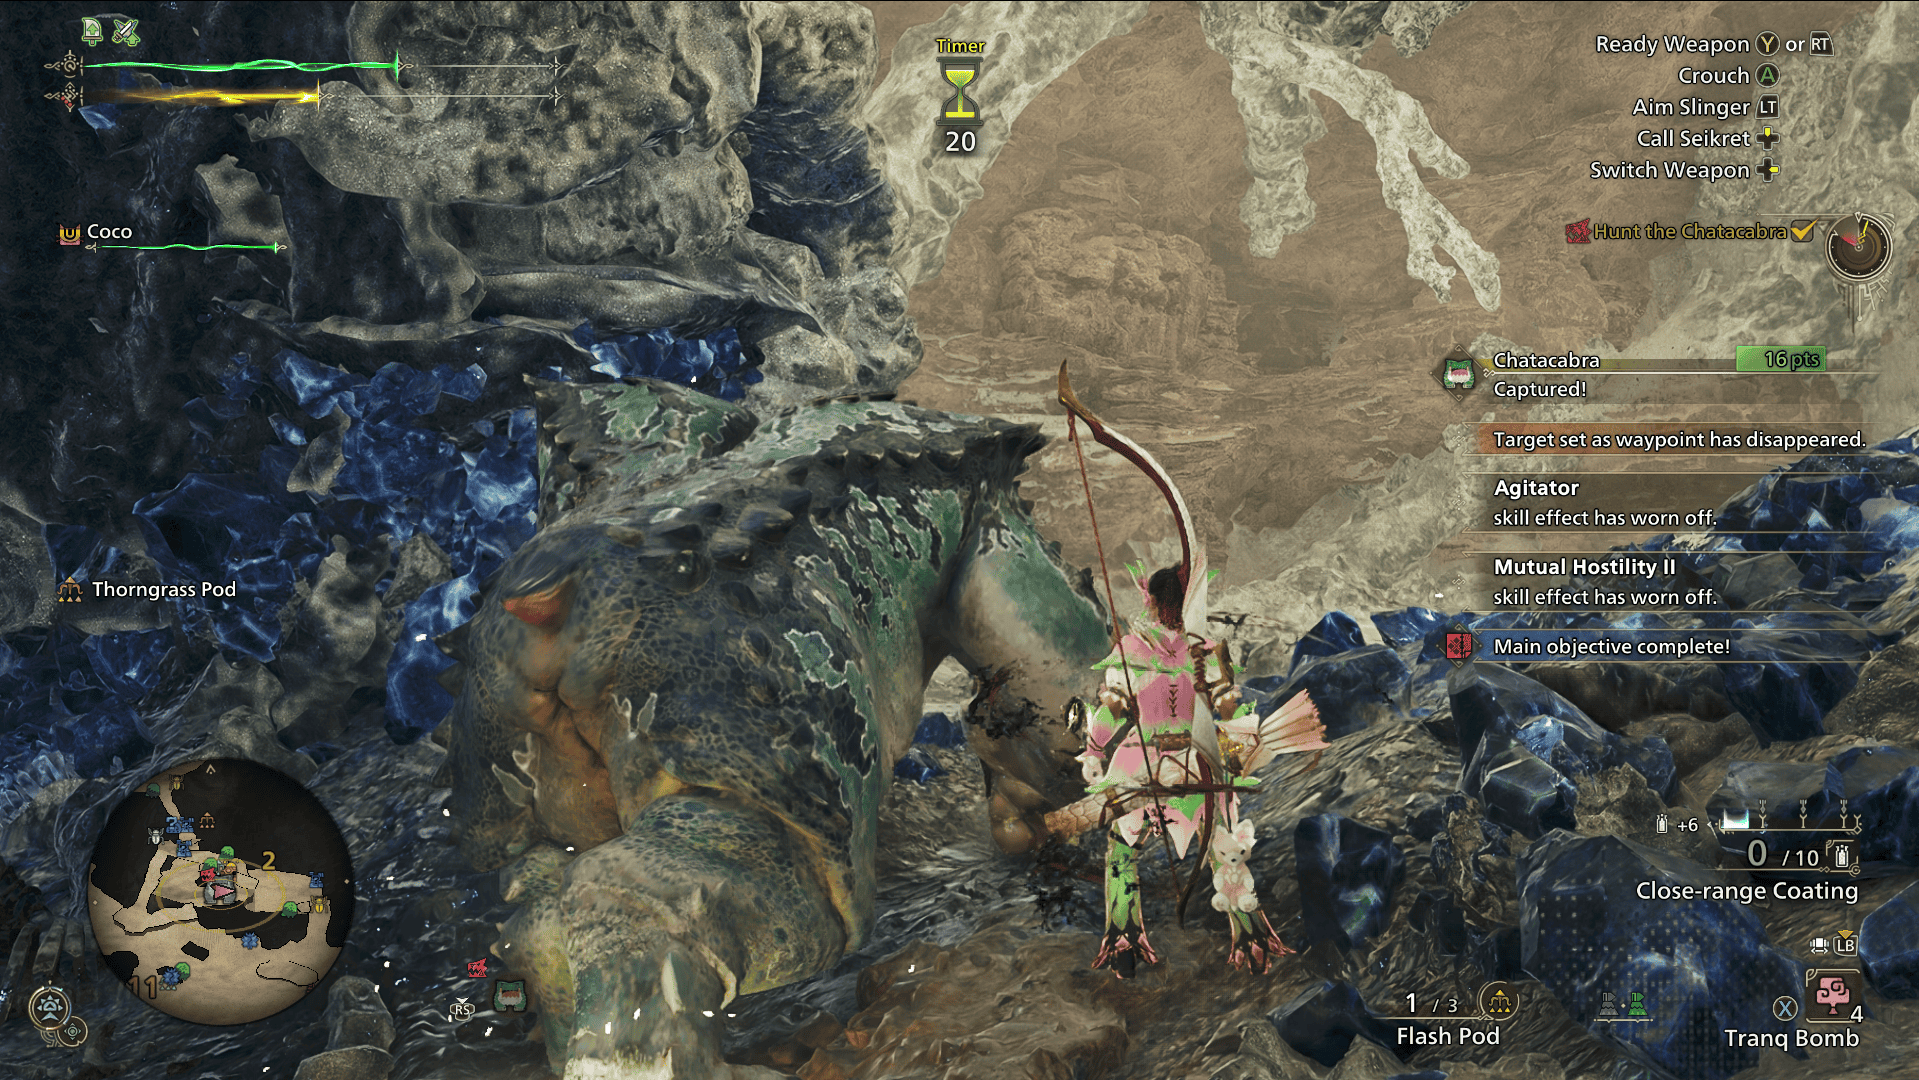
How And When To Capture A Monster In Monster Hunter Wilds
Sometimes you may want or need to capture a monster rather than killing it. But the exact process for this can be hard to work out for new players. To capture a monster, you will need to make sure you bring traps on your hunt, as well as something to tranquilize the monster. This is most likely to be tranq bombs, but you can also use the tranq blade ammo for the slinger or even tranq ammo for the heavy bowgun. So long as you have the following equipment, you can set out on your hunt as normal.
Once the monster reaches it’s skull state (where it’s at very low health and its icon on the mini-map displays a skull beside it), you should stop damaging the target. Instead, you’ll want to place your traps and lure the monster into them. Once it is trapped, use your tranq items on it (typically a couple of times) until it is captured. You can’t carve a captured monster, but you will still get material rewards for the hunt. Some quests will specify a capture rather than a kill, but there are also times when it would be wise to capture a monster. If you manage to get the monster down to skull health, but you’re very close to running out of time or faints, then capturing it is a way to end the hunt safely and quickly.
The most important advice I can end with is not to panic at the overwhelm. You don’t need to be an expert at every facet of a hunt when you’re just starting out. However, getting to grips with these mechanics sooner rather than later can help you out down the line. With this guide to see you on your way, your next step is to get that all important hands-on experience, preferably side by side with some more experienced hunters! Help others out in the comments by sharing the tips that helped you the most. Can’t decide on what weapon to wield? Check out our Monster Hunter Wilds weapon guide!